
Getting Started with Quick Payable
This guide walks a new Salesforce admin through installing Quick Payable, setting up user access, and processing your first invoice from start to finish.
What You'll Need
- A Salesforce org (Production or Sandbox) with System Administrator access.
- A list of the people who will use Quick Payable, and what role each one plays. Quick Payable uses two roles: QP Admin and QP Staff.
- A shared or dedicated email address you're comfortable connecting for inbound vendor invoices, if you plan to use email-based invoice capture.
- Login details for your ERP or accounting system, if you plan to connect one during setup (this can also be done later).
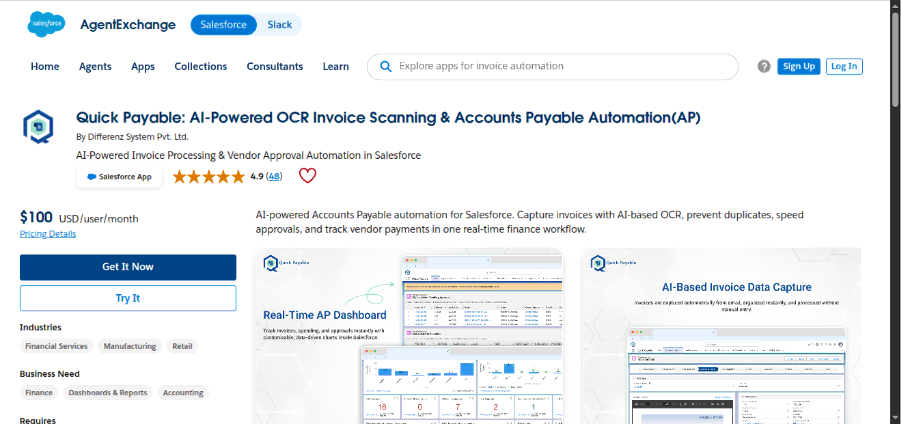
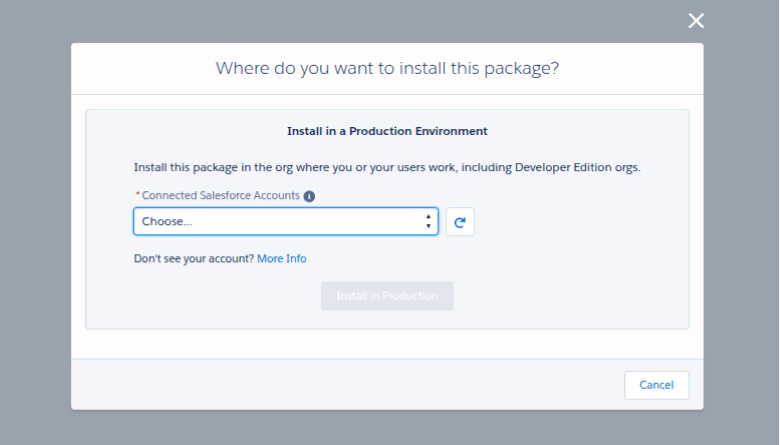
Step 1: Install Quick Payable from Salesforce AppExchange
- Go to the Quick Payable AppExchange listing.
- Click Get It Now and choose whether to install in Production or a Sandbox first. We recommend testing in a Sandbox before installing in Production if this is your first Salesforce managed package installation.
- After selecting Production or a Sandbox and clicking Install, a pop-up shows the installation details, including package details and your profile details. After confirming, you'll be redirected to the login page.
- Enter your org's login credentials. You'll then see a pop-up asking you to choose an install option, select Install for Admins Only so you control access before anyone else logs in.
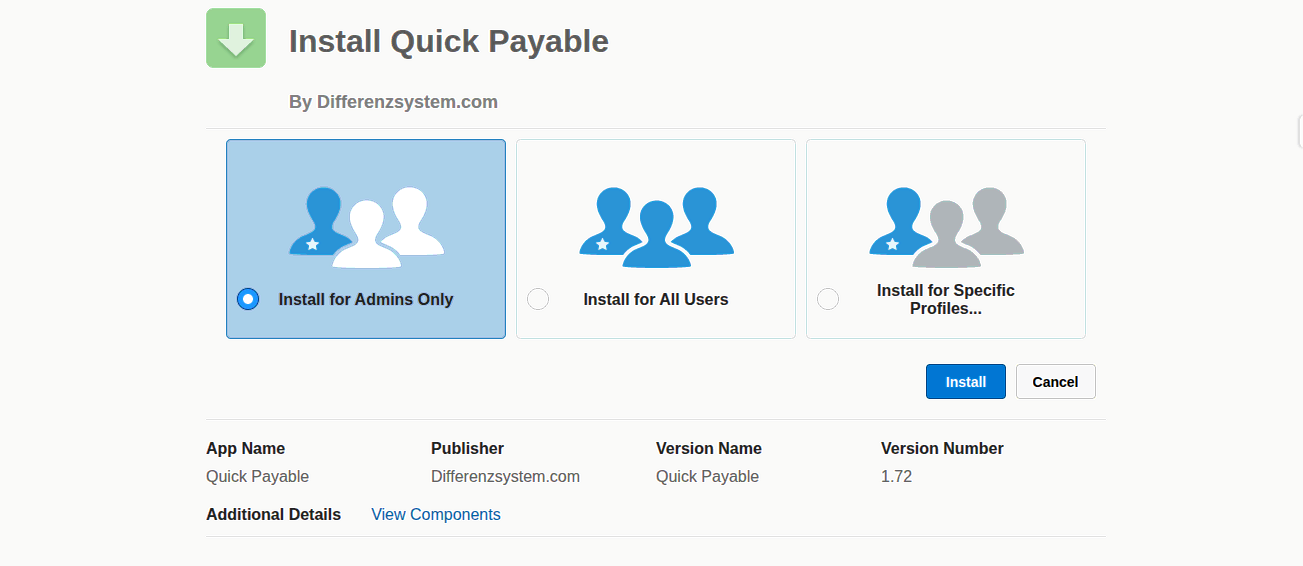
- Salesforce will prompt you to approve access to trusted third-party services used by Quick Payable. Ensure the checkbox "Yes, grant access to these third-party websites" is selected, then click Continue.
- Wait for the installation confirmation email from Salesforce before continuing. Package installation can take a few minutes.
Step 2: Assign Permission Sets and Licenses
- In Salesforce, click the Gear icon and select Setup.
- In the Quick Find box, search for Permission Sets and open the Permission Sets page.
- Verify that the Quick Payable permission sets were installed successfully with the managed package.

- Open the appropriate Quick Payable permission set and click Manage Assignments.

- Click Add Assignments, select the users who require access, and click Assign.
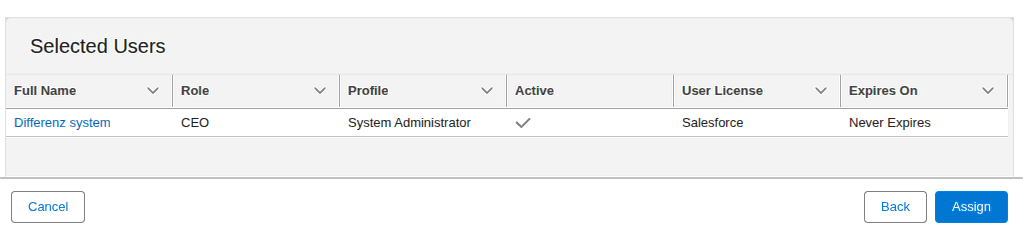
- Assign the administrator permission set to users responsible for configuring Quick Payable, including approvals, vendors, and integrations.
- Assign the appropriate user permission set to QP Admins and QP Staff based on their responsibilities.
- Verify that each assigned user has an active Salesforce user record and an available Salesforce license, as permission sets alone do not grant access.
Step 3: Connect Your Invoice Inbox
Quick Payable captures invoices sent to a Salesforce Email Service address. Setting this up correctly is what makes email-based invoice capture work, so it's worth configuring even if most of your invoices arrive by manual upload to start.
- Navigate to Setup.
- In the Quick Find box, search for Email Services.
- Click New Email Service.
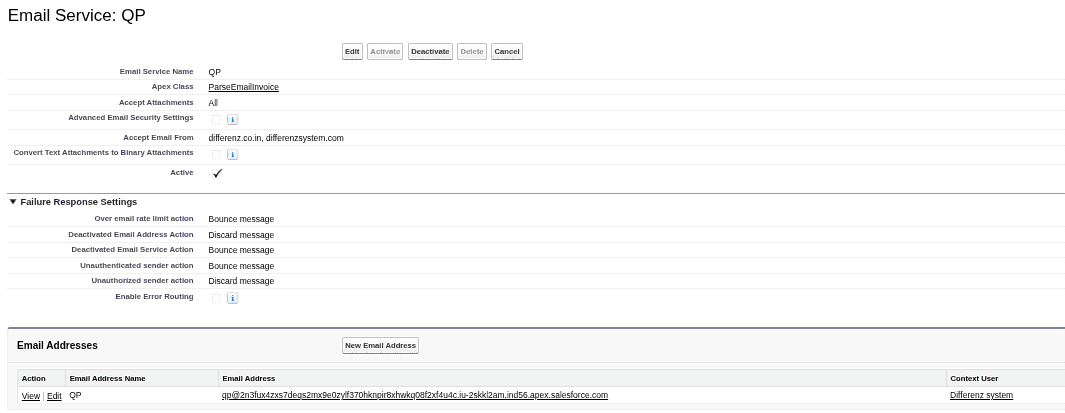
- Configure the Email Service using the following values:
| Field | Value |
|---|---|
| Email Service Name | QP (or any preferred name) |
| Apex Class | ParseEmailInvoice |
| Accept Attachments | All |
| Accept Email From | Specify the domains that are allowed to send invoice emails (e.g., differenz.co.in, differenzsystem.com). |
| Active | Enabled |
| Over Email Rate Limit Action | Bounce message |
| Deactivated Email Address Action | Discard message |
| Deactivated Email Service Action | Bounce message |
| Unauthenticated Sender Action | Bounce message |
| Unauthorized Sender Action | Discard message |
| Enable Error Routing | Optional |
- Save the Email Service.
- Under the Email Addresses section, click New Email Address.
- Enter an Email Address Name.
- Configure the Accept Email From values for the Email Address if required.
- Save the Email Address.
- Use the generated Email Service Address as the invoice inbox, or configure your mailbox to forward vendor invoices to this address.
- Send a sample PDF invoice to verify that Quick Payable successfully creates an invoice record and processes it using OCR.
- To verify that the invoice has been created, open the App Launcher and select the Quick Payable app. Navigate to the Payable Invoices tab. If you do not see the newly created invoice, change the list view from Recently Viewed to All Invoices – Admin and verify that the invoice was successfully created and processed.

Step 4: Add Your First Vendor
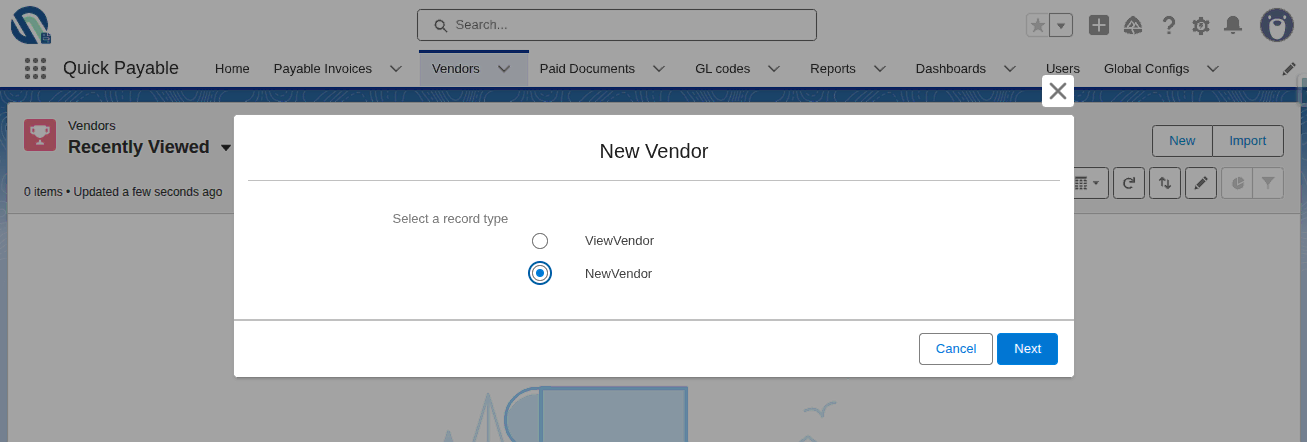
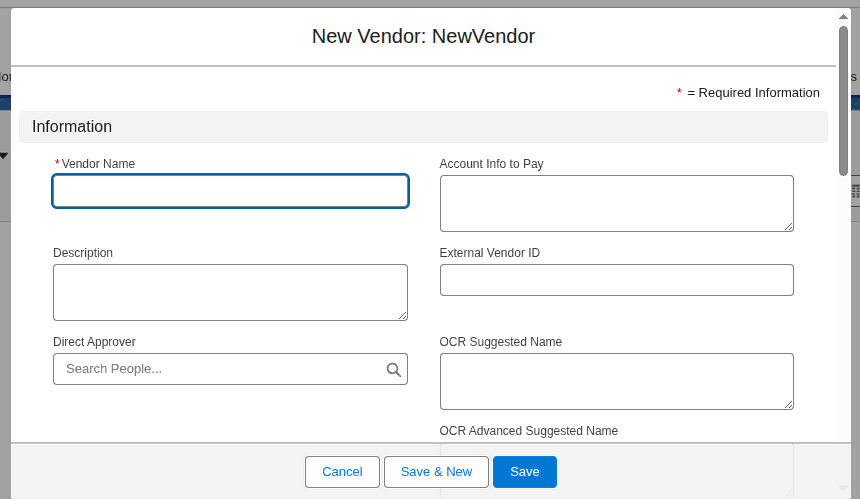
- Go to the Vendors section and create a new vendor record with the vendor's name, contact details, and payment terms.
- Add any GL code or cost center defaults you want new invoices from this vendor to inherit automatically.
- If you plan to use vendor self-service invoice submission, note that the vendor portal is set up separately and can be configured once your core workflow is working.
Step 5: Set Up Approval Routing (Users Tab)
Quick Payable does not use a separate Approval Rule configuration or standard Salesforce Approval Processes. Approval routing is controlled entirely by how you configure users in the custom Users tab, not through Salesforce Approval Processes or generic approval rules.
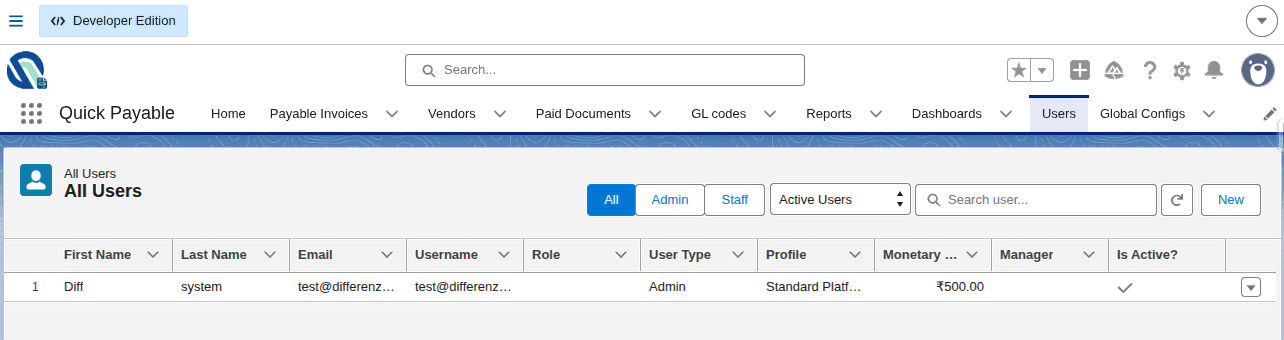
- From the Quick Payable app, navigate to the Users tab.
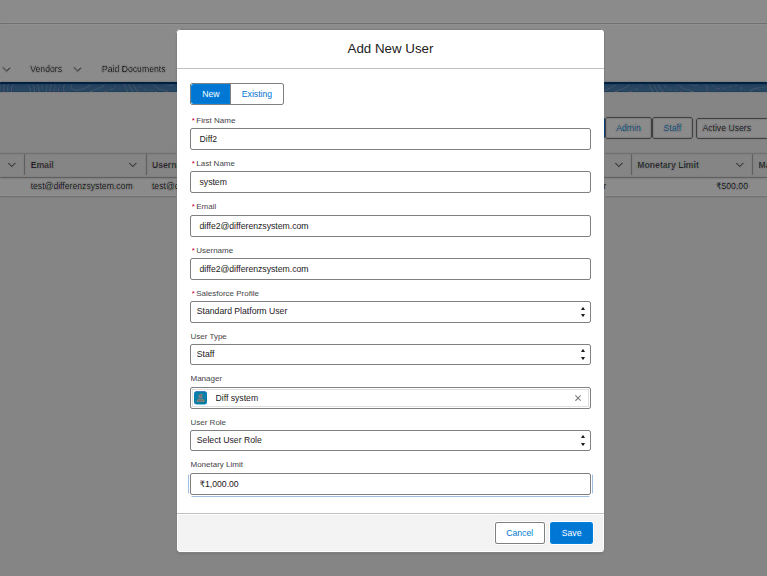
- Create a new user or edit an existing user.
- Configure the required user information, including:
- Role (Admin/Staff)
- Profile
- Monetary Approval Limit
- Manager
- Active status
- Other required user details
- Save the user record.
Example:
- If a user is assigned an invoice with an amount that is less than or equal to their configured Monetary Limit, they can approve it.
- If the invoice amount exceeds the user's Monetary Limit, the invoice is automatically routed to the configured Manager for approval.
Step 6: Process Your First Invoice
Manual Invoice Upload
- Navigate to the Payable Invoices tab.
- Click New.
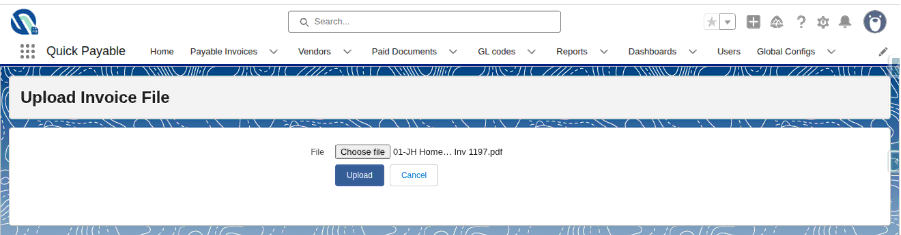
- Click Choose File and select the invoice PDF you want to upload.
- Click Upload.
- Once the upload is complete, you'll be automatically redirected to the newly created invoice record, where you can review the OCR-extracted invoice details.
Email Invoice Processing
If you want to process invoices through email, send the invoice PDF to the Email Service Address that was configured in Step 3. Quick Payable will automatically create an invoice record and process the invoice using OCR.
Once processed, correct any extracted fields that need adjusting (this is a normal part of the first few invoices as the system settles into your specific invoice formats), then confirm the invoice routes for approval based on the Monetary Limit and Manager you configured in Step 5.
What's Next
Once your first invoice has made it through the full cycle, these are good next steps:
- Workflows : understand how approval routing behaves as your volume grows.
- Administration : Manage users, roles, and permission sets as your team grows.
- User Guide : Day-to-day instructions for QP Admins and QP Staff.
- Integrations : Connect your ERP or accounting system if you haven't yet.
- Troubleshooting : Common setup issues and how to resolve them.
Need help with setup?